When Jeffrey first told me he was going to do the tile work himself, I have to admit I was a little skeptical. There was a lot of prep work to do, a lot of youtube video how-to's to watch and a lot of patience to come. We wanted the job done right, so there was no cutting corners here. First things first was to put down a layer of hardibacker board over all the floors and walls that were to be tiled. Here you can see Jeffrey working into the Master Bath from the closet area with the thinset. The boards were all pre-cut and put in place and then we came back with the thinset and screws to secure them. This part alone took a good part of a week working off and on.

After all the backerboard was installed on Friday, I started laying the tile out in the powder room to get a feel for the layout, and the easiest way for cuts. Since it was such a small room, I just went with a standard grid layout and this room went pretty fast. Cutting the circle around the toilet flange was the hardest part (FYI - I didn't do any of the cutting). Here is a shot of the room after we came back on Sunday and cleaned it up a bit. Looks good to me!
Of course Saturday we were back at it again, this time in the upstairs bathroom, finishing up what we couldn't get done the night before. The upstairs bathroom has the same tile layout as the powder room above. It also went pretty fast, but I forgot to take any pictures of the finished floor!
Then we started in the kitchen.
I had decided the grid layout looked okay in the smaller bathrooms, but I had already had it on my mind that the kitchen and halls were going to be on a diamond pattern. I didn't like the idea of looking down those long straight (or not so straight) grout lines. So it took us a little while to determine the best layout for the floor, and finally pop a chalk line to get us going.
After doing the front section of the kitchen, we moved around to the galley side of the kitchen, about the time it started snowing! Poor Jeffrey was out there on the porch getting snowed on all afternoon while his tile saw had ice sickles hanging from it by nightfall.
But we got the kitchen finished and we came back Sunday afternoon to do the back hallway.
Last night we started and finished the walk-in closet, and tonight - we're in hopes to finish the floor to the master bathroom. So as you can see, it's a work in progress, with a long ways still to go. A few hours here and there doesn't seem like a lot, but every little bit goes a long way!
(I still have no idea on when the tub and shower will get tiled!)
 As I reported back in November, Occasionally I’ll be selected to
review a new product through a program I joined online. This time
around, the item wasn’t as much for me as it was for the girls. Although
Charlotte still has a few pounds before it will fit her properly, Josie
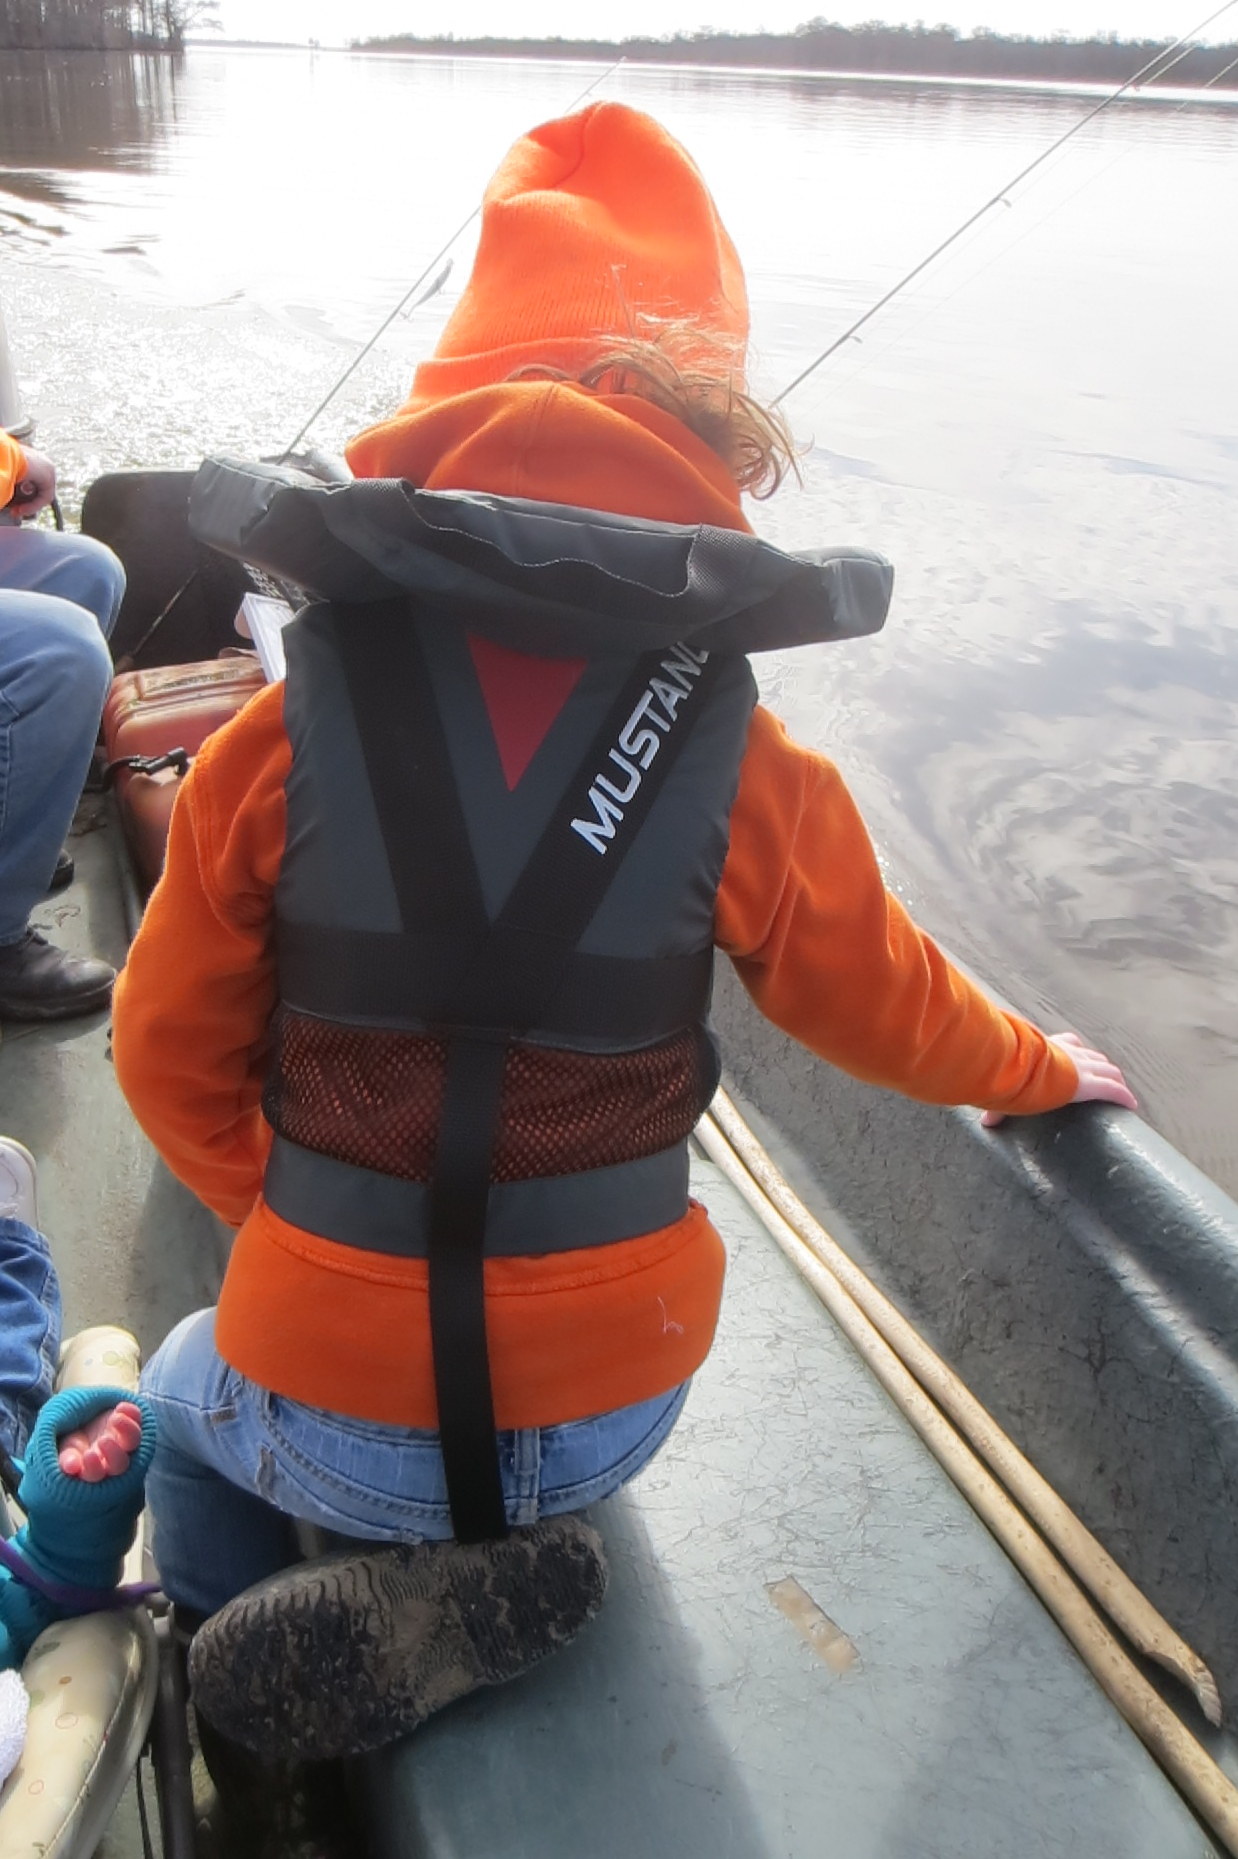
still falls within the recommended range. When I first opened the
package I was a little taken back by the design of this life jacket. My
family spends a lot of time in boats and on the water, so I’ve seen my
share of life jackets for myself and two daughters. This jacket is built
like most of the infant life jackets I’ve used, with a floatation ring
around the neck. I thought at first that Josie (4 years old) would hate
this and it would be more uncomfortable than her Stearns Hydroprene
Jacket that she’s used for boating and swimming for the last year or so.
After the first wearing of the mustang jacket in the boat however, she
chooses this jacket every time. What makes this jacket different is that
the back of the jacket is completely mesh, so it’s much more
comfortable and fitting to her shape.
As I reported back in November, Occasionally I’ll be selected to
review a new product through a program I joined online. This time
around, the item wasn’t as much for me as it was for the girls. Although
Charlotte still has a few pounds before it will fit her properly, Josie
still falls within the recommended range. When I first opened the
package I was a little taken back by the design of this life jacket. My
family spends a lot of time in boats and on the water, so I’ve seen my
share of life jackets for myself and two daughters. This jacket is built
like most of the infant life jackets I’ve used, with a floatation ring
around the neck. I thought at first that Josie (4 years old) would hate
this and it would be more uncomfortable than her Stearns Hydroprene
Jacket that she’s used for boating and swimming for the last year or so.
After the first wearing of the mustang jacket in the boat however, she
chooses this jacket every time. What makes this jacket different is that
the back of the jacket is completely mesh, so it’s much more
comfortable and fitting to her shape.